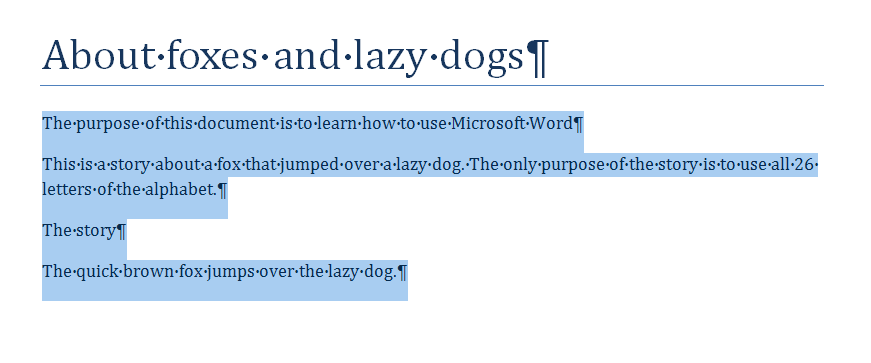
TutorialStep 1 Type the first few paragraphs of textThis page is about how to format your text using styles. To demonstrate how styles work, we will use the first few paragraphs of the sample document. Type the first few paragraphs of text (following the rules for typing in Word discussed in the previous Basic Concepts page). Don't worry yet about formatting or fonts or making text bold. Your screen should look something like this (assuming you have clicked the ¶ button to display end-of-paragraph markers):
Step 2 How to format text using stylesObviously the text we have on the screen so far isn't what we have in mind for a nicely formatted document. We need to make the Title and the Headings large and bold. And, we need space after the paragraphs. To achieve that, you need to do two things:
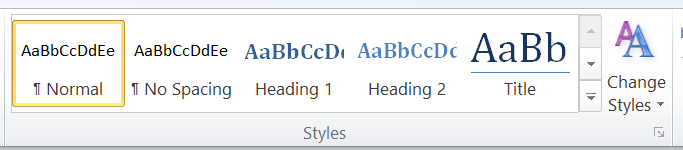
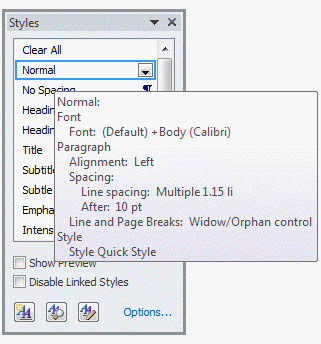
Step 3 How to see Word's stylesWe need to get a bit organized before we can continue. For the moment, would you just trust me and do the following? We can worry later about what we did.
Step 4 How to format the title of your documentThe first paragraph is the Title of the document, and we need to tell Word that it's the Title. Put the insertion point anywhere within the first paragraph, which is the Title. To do that, click in that paragraph with your mouse, or use the arrow keys. Move your mouse pointer over the Title style at the far right of the Gallery. (If you don't see the Title style, click on the scroll bar on the right side of the Gallery until it is displayed. The text in your document will preview the appearance of the paragraph with the Title style applied. You can hover over other styles to see what they look like as well. Click on the Title style and it will be applied to your title. You can now see two things:
Step 5 How to format Body TextThe first paragraph of our document was the Title. The second and third paragraphs are body text. For now, we will format these using the Normal style. (See addendum below on setting up Body Text style on your computer to use it instead of the Normal Style.) Use the mouse or the arrow keys to move the Insertion Point into the second paragraph (the one that starts "The purpose of this document …"). From the Gallery, choose Normal. Then repeat that process for the third paragraph. Your text will now look something like this:
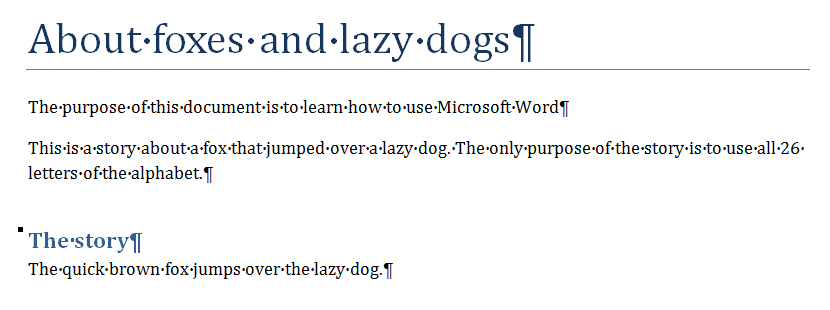
Normal style may be defined differently on your machine. But you can probably see that the Normal style has some space after each paragraph. That's why you don't need to press Enter twice after a paragraph. Step 6 How to format HeadingsThe way to make your headings large and bold is to format them using the Heading 1 style. The fourth paragraph of our text ("The story") is a heading. Position the Insertion Point anywhere within that paragraph. Use the Style Gallery to applly the Heading 1 style. Then apply the Normal style to the paragraph after the Heading. Your screen should then look something like this:
Your machine may be set up so that Heading 1 is formatted differently from what's shown here. It may be a different font, a different size, a different colour, or with more or less spacing before or after the paragraphs. If you don't like the way that Heading 1 is formatted, you can modify the Heading 1 style. Use the keyboard shortcut Ctrl+S to save your work. Quick ReviewLet's go back and review what you've done.
Step 7 But I don't like the way the text is formatted: How to modify a styleA style is a collection of formatting instructions. The formatting instructions are a description of how the style is to look. The style definition includes information about the font, text size, text colour, background colour, paragraph alignment (for example, aligned left, or centred), and the amount of space before or after the paragraph. A style can even be formatted to include a border, shading, an indent or automatic numbering. If you don't like the way, say, the Title style is defined on your machine, you can modify the Title style. Try this, just as an experiment. We'll modify Title to be orange. Right-Click on the Title style in the Styles Gallery and pick "Modify" from the context choices presented. In Word 2002, to change Body Text to blue, do this.
Modifying a style affects all uses of that style in the DocumentThe most important thing to note here is this. When you modified the Title style to be orange, all your Title paragraphs will become orange. That's why styles are really powerful. No matter how big your document is (it might be 1,000 pages long), you can change all your Title paragraphs to orange with half a dozen clicks of the mouse. Experiment! You're not going to send this test document to anyone, so it doesn't matter what kind of mess you make. If you don't like orange text, try green by modifying the title style as you did above. If you prefer your Heading 1 style to be larger or smaller, try a different font size by modifying the Heading 1 style. Put more or less space before or after the Title by modifying the Title style. You could try removing the bottom border or adding a top border. For more information about modifying styles see How to modify a style in Word. See also:
|
 `
` `
` `
`
ReferenceThis page has shown you how to format your text using Styles.
|
Go to the next concept:
4: Use tables and tabs to arrange text, not spaces
or continue to read the Curiosity Shop box.
For more styles: See Q&A Styles in Word by Suzanne Barnhill, MVP
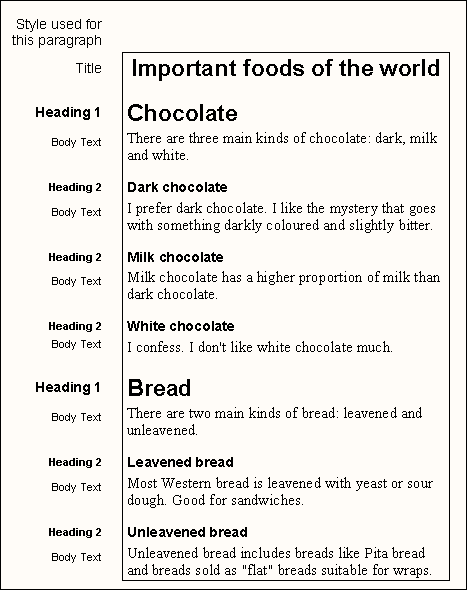
Curiosity Shop: More about heading styles1. Why does Word have 9 Heading styles?If you really explore, you'll find that Word has 9 Heading styles. They're called Heading 1, Heading 2 etc. Only huge technical documents would use all of them. You might use two or three levels of headings. You won't even see most of these ordinarily until you've used the heading style above. Here's an example that uses Heading 1 for main headings ("Chocolate") and Heading 2 for subheadings (for example, "Dark chocolate"). This picture shows the style that has been applied to each paragraph.
The 9 Heading styles are really important styles, because they have "magic" properties. When you come to do larger documents, using Heading styles can save you hours of work in creating a table of contents or index or automatically numbering figures or tables in your document. 2. Numbering headingsWord can automatically number your headings. You might want your document to look something like this: 1. Chocolate Don't type numbers (or letters) like this by hand. Get Word to insert them for you. If you want to add numbers to your headings, see How to create numbered headings or outline numbering in Ribbon Versions of Word . 3. Why use the Heading styles?There are many other ways to format your headings in Word. The best way is to apply Word's Heading 1, Heading 2 etc styles. If you need convincing, here are Why use Word's built-in heading styles?. 4. Getting a different ViewIf you click the View tab in Word, you'll see that there are five different ways to view your document:
These give you different ways to view your document. They all have advantages and disadvantages. You are currently using Print Layout view. This is the view most like what you'll see when you print your document.
5. Keyboard Shortcuts to use Heading Styles Word comes with built-in keyboard shortcuts for Heading Styles 1-3. They are Ctrl+Alt+1, Ctrl+Alt+2, and Ctrl+Alt+3. You can add more shortcuts for heading styles 4-9 or use my macro-free Add-In.
|
Next: Concept 4: Use tables and tabs to arrange text, not spaces
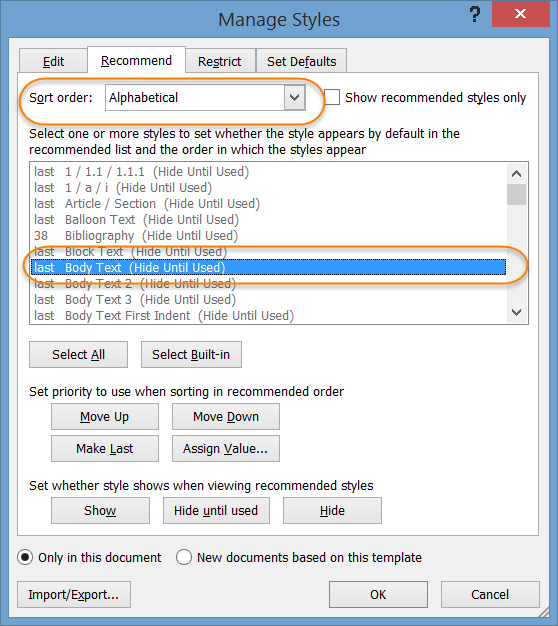
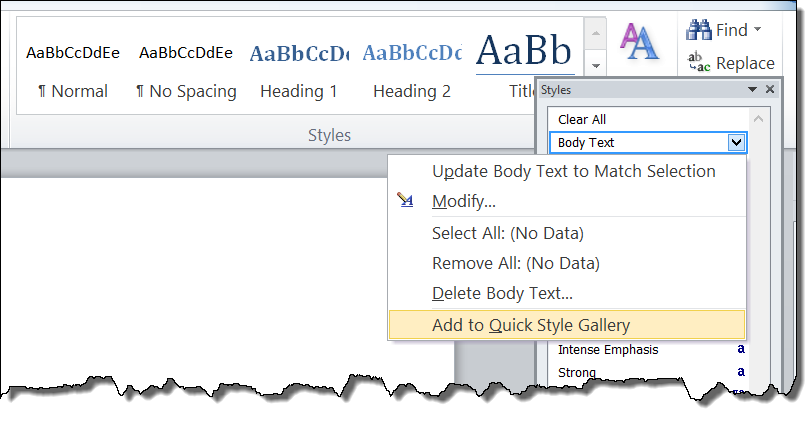
Addendum - Using the Body Text Style Instead of Normal Style - Charles Kenyon additionShawna's original page described use of the Body Text style instead of the Normal style for body text in a document. This is a very important concept and recommended. Unfortunately, recent versions of Word have made this a bit more difficult. You will need to modify the Body Text style in your normal template to get it to show up at all on yosur Quick Styles Gallery or other styles lists. See: Setting Body Text Style to show and be useful - a simple macro. Why it is important to use a Body Text style instead of the Normal style for your Body Text.One clear reason is that the Normal style is the basis for many other styles. Changing it will change those styles as well, changing not only letters and reports, but also envelopes and labels. You probably would like to change the body of a document without, for instance, changing captions on figures in the same way. Controlling which styles appear in Ribbon versions of Word
(Or, you can use the macro shown in my article on the Microsoft site: Setting Body Text Style to show and be useful - a simple macro .)
|

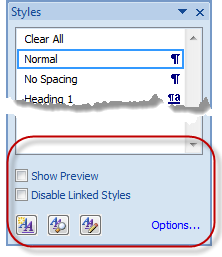 In Word 2007 and later
at the bottom of this Style pane there are two checkboxes, three buttons,
and the Options... choice.
In Word 2007 and later
at the bottom of this Style pane there are two checkboxes, three buttons,
and the Options... choice.

Next: Concept 4: Use tables and tabs to arrange text, not spaces